
Tell us about your project and we’ll follow up with a clear, no‑pressure quote and timeline.
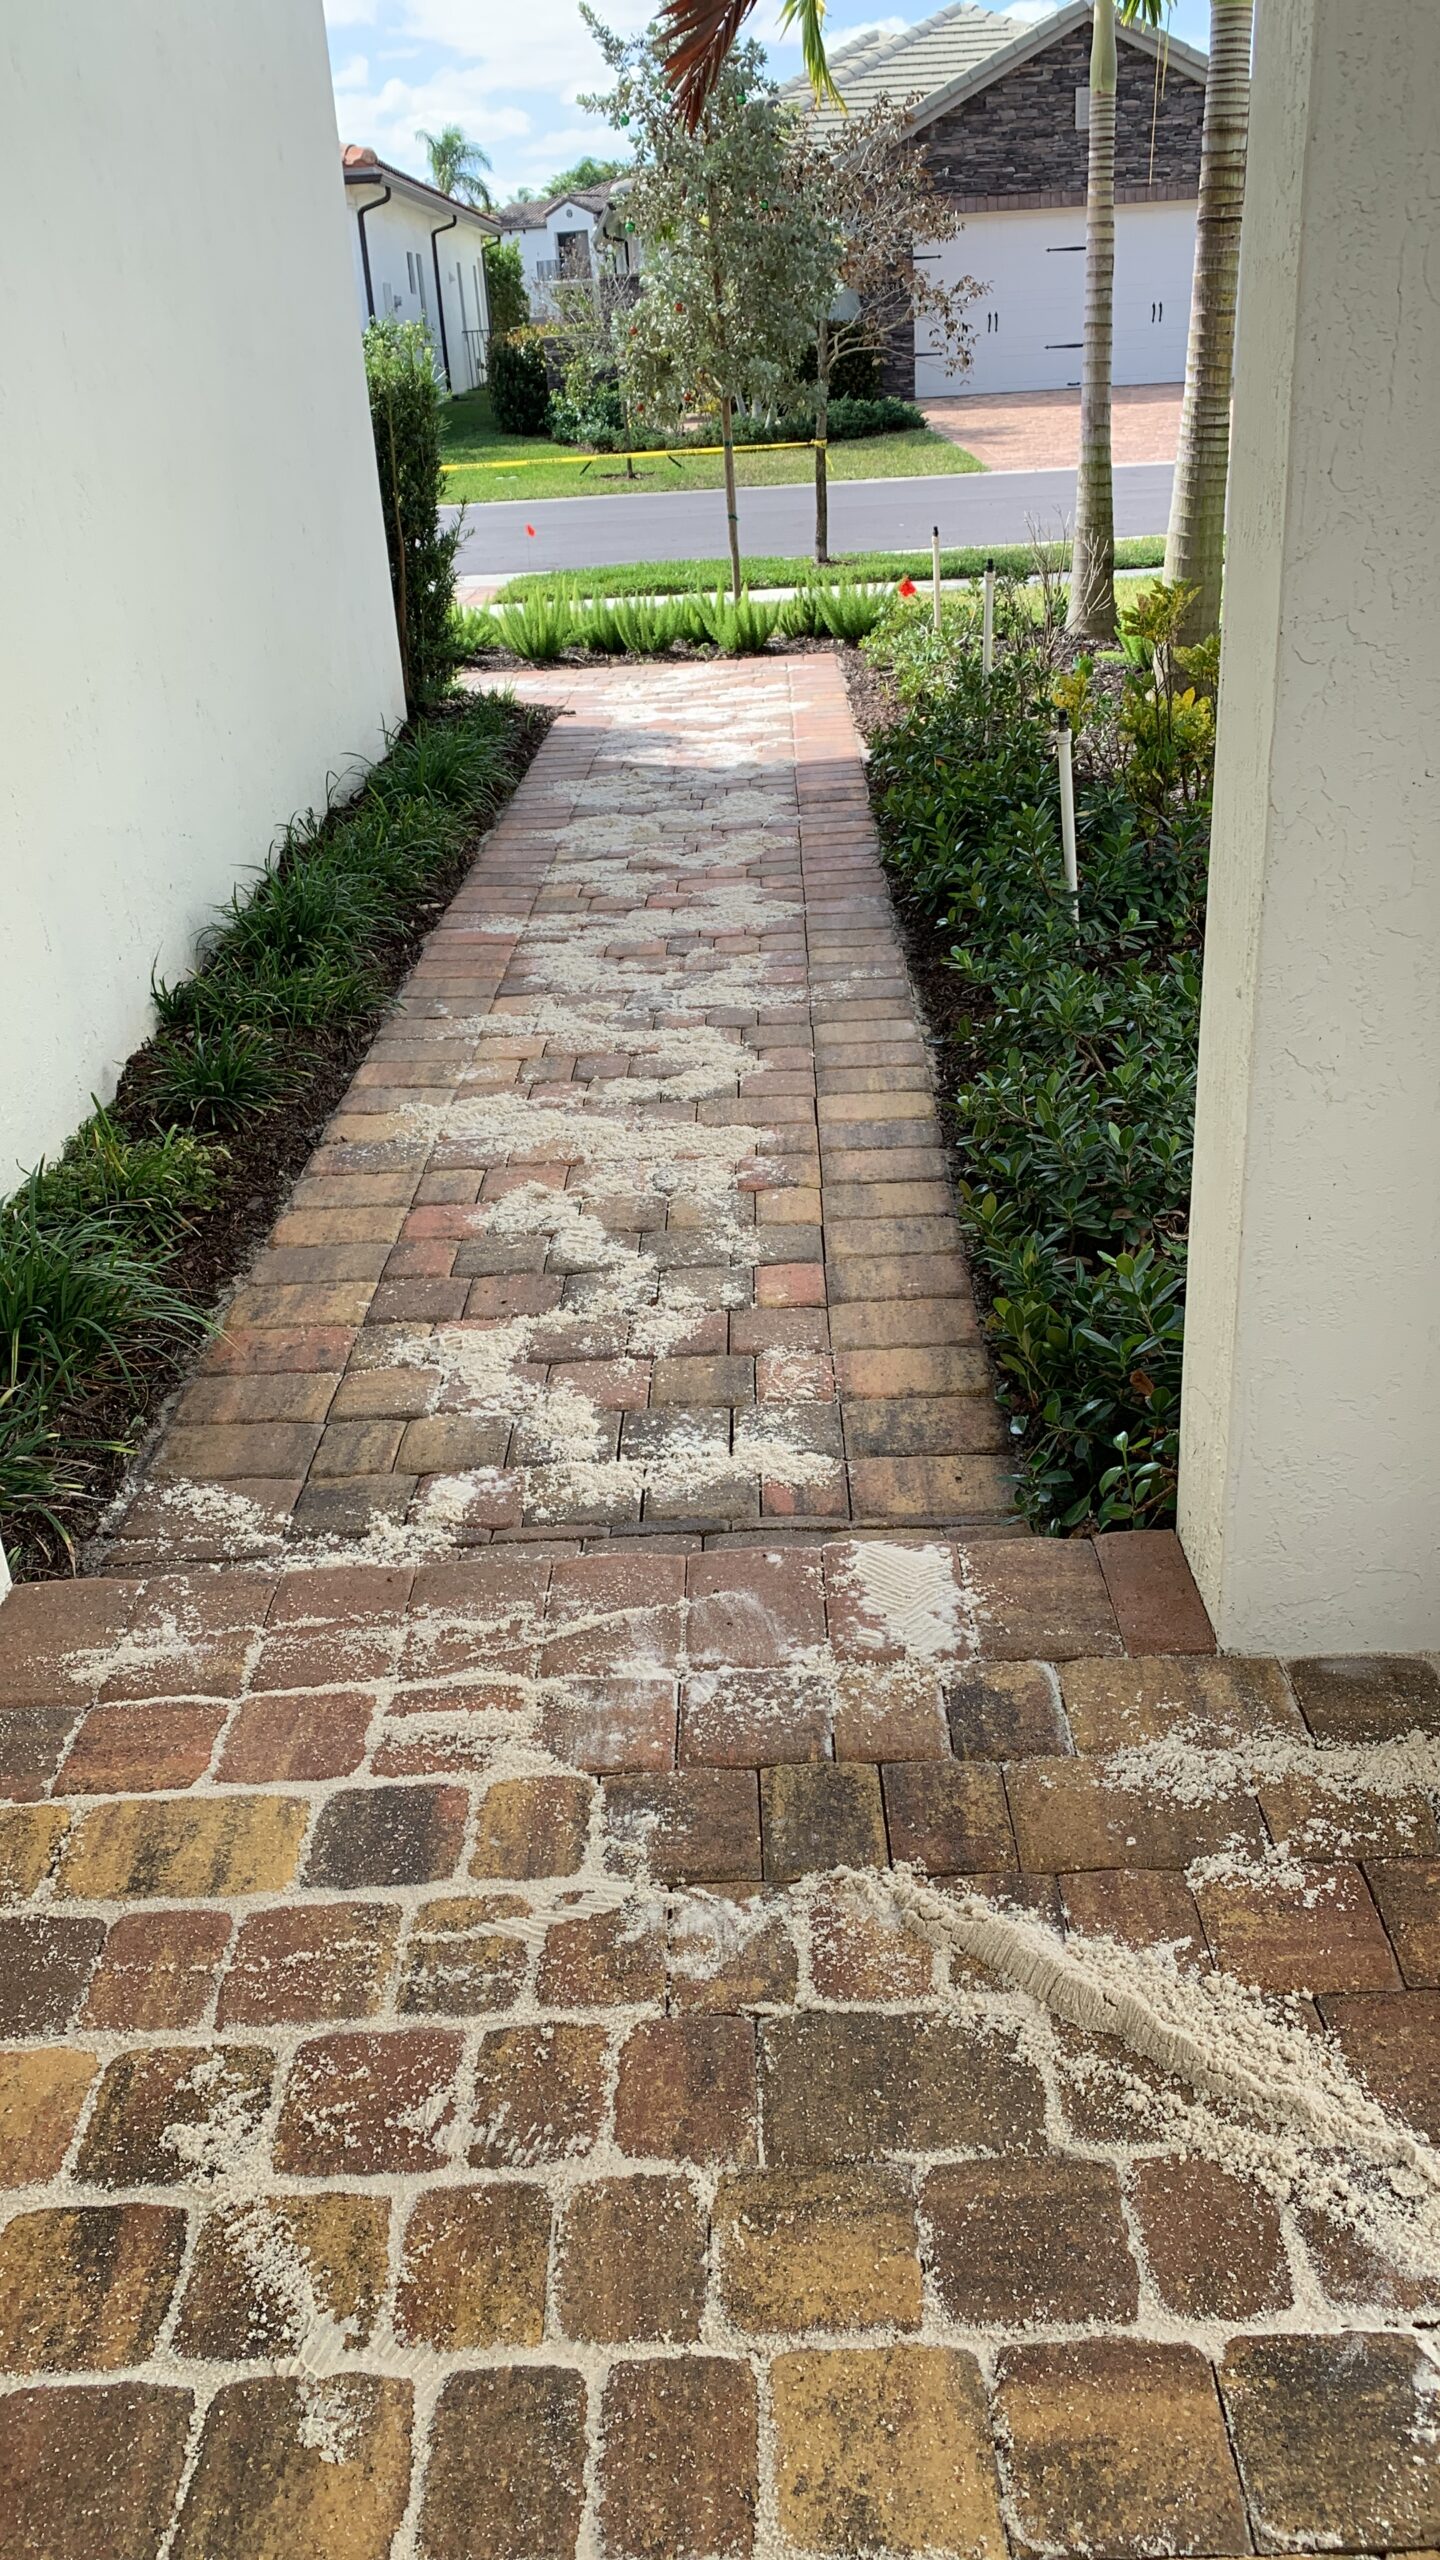
When you look at your driveway or patio, do you see clean lines between each paver, or dusty gaps where weeds and ants love to move in? Those little spaces matter more than most homeowners realize. Before we ever open a sealer bucket, brooming joints for paver sealing is one of the most important steps we take.
Think of joint sand as the glue that keeps your outdoor surface tight, stable, and ready for that fresh, protected look. If the joints are empty or uneven, sealing right over them only locks in problems.
Over time, South Florida rain and pressure washing wash sand out of the joints, leaving your pavers loose and your surface looking tired. Once that happens, you start to notice:
Wobbly pavers where tires or foot traffic hit the same spots.
Weeds pushing through the gaps after every storm.
Ants tunneling, leaving little sand piles on the surface.
Edges that creep and spread because nothing is holding them tight.
On our paver sealing services jobs, we always tell homeowners: most of your long‑term paver problems start right in those joints, not on the surface.
Before we even touch a broom, we give your pavers a deep clean. Any dirt, mildew, or old sand left on top will get in the way of good joint fill and good sealer.
Here’s what usually happens on a typical driveway or patio:
We pre‑treat stains and organic growth.
We use pro surface cleaners (not just a wand) to wash the entire area evenly.
We rinse thoroughly so old joint material and dust are flushed out.
If you want to see this step in more detail, you can read our walkthrough in the paver walkway cleaning and sealing guide. That same process works on driveways, patios, and pool decks.
Once everything is dry, brooming joints for paver sealing is where the real transformation starts. We usually use a polymeric or joint‑stabilizing sand designed to harden once it gets wet.
Here’s how we handle it on your project:
Spread fresh sand over the surface. We dump small piles and pull it across the pavers.
Broom the sand into every joint. The goal is to fill from the bottom up, not just dust the top.
Check for low spots. We go back over areas where joints still look shallow and add more sand.
Clear the surface. Before sealing, the tops of the pavers should be almost completely free of loose sand.
On our brick paver patio re‑sand and sealing prep project, the patio already looked cleaner just from fresh, properly broomed joints, even before the sealer went down.
Once the joints are filled and broomed correctly, it’s time to protect your work. This is where our full paver sealing process comes in.
A good sealer does two big jobs at once:
It helps lock the joint sand in place so rain and sprinklers don’t immediately wash it away.
It shields the paver surface from UV fading, stains, and water intrusion, making future cleaning easier.
Depending on what you like, we can go with a natural-look finish that keeps things subtle, or a richer “color-enhanced” look that really brings out the tones you saw when the pavers were first installed. You can browse recent results in our paver sealing projects gallery to get ideas before you decide.
Brooming joints for paver sealing helps in any area with heavy use or constant water, especially:
Driveways where cars turn, brake, and leak fluids.
Pool decks where water and pool chemicals hit the same spots day after day.
Patios and walkways that see furniture scraping and foot traffic.
If you’re still planning your outdoor space, pairing proper joint prep with professional paver installation gives you the strongest, longest‑lasting result from day one.
Once your joints are freshly broomed and sealed, a little easy maintenance goes a long way:
Sweep regularly so debris doesn’t break down into the joints.
Rinse off sand piles or ant hills before they spread.
Avoid harsh chemicals or constant high‑pressure washing that can strip sand and sealer.
Plan on a maintenance clean and reseal every few years, depending on sun and traffic.
If you’re not sure what shape your joints are in, take a close photo looking straight down at your pavers. You should see sand up to about the bottom of the bevel on each edge, not deep empty gaps.
If your pavers look like the “before” photos on our project pages, you don’t have to live with weeds, ants, and loose stones. We’re a family‑run team focused on cleaning, sanding, and sealing pavers the right way for homes across South Florida, as you can see on our about us page.
Send us a few photos of your driveway, patio, or pool deck and request a fast, no‑pressure quote through our free estimate form. We’ll tell you exactly what your joints need, how long it will take, and what it will cost, so your next “after” photo is one you’re proud to pull into every day.
Yes. Brooming fresh sand into the joints gives the pavers support and keeps them from shifting before sealer goes down. It’s built into our full paver sealing service so your surface looks better and lasts longer.
We usually recommend a high‑quality joint or polymeric sand that’s made to harden slightly once it gets wet, so it helps lock the pavers together. This is the same style of joint sand we use on our re‑sanding and sealing prep projects.
If you see deep gaps, loose blocks, or lots of weeds and ant hills between the pavers, your joints are ready for fresh sand. Our general paver services overview notes that joint re‑sanding is a common fix before sealing or restoration.
Yes. After brooming joints for paver sealing, a good penetrating sealer helps hold that sand in place and reduces wash‑out, weed growth, and shifting over time. That added joint protection is one of the main benefits listed in our paver sealing process.
In our climate, most driveways and patios stay in good shape for about 2–3 years before they need a maintenance clean, light re‑sand, and fresh sealer. You can see how well this holds up over time by browsing our finished paver sealing projects across South Florida.
Short, practical articles to help you keep your driveway, patio, and pool deck looking freshly sealed between professional visits.


South Florida homeowners trust us to clean, sand, and seal their pavers the right way the first time, here’s what they’re saying after seeing their driveways, patios, and pool decks transformed.
Broward County, Miami-Dade County, & Monroe County